
Roof Replacement Before & After Photos
Click on a photo to enlarge.
Amazing New Shingle Roof in New Haven.


Multiple leaks were the reason for this homeowner to seek out a roof replacement. Ultimately, they chose the Brown Roofing team for the job. The condition of the existing shingles on the old roof was not great. the new IKO Dynasty shingles installed by our team give new life and beauty to this home. This customer chose the color Summit Gray for their roof transformation.
New Haven, CT Roof Replacement


This homeowner worked with Inspector Darwin and Project Manager Noel to choose IKO Dynasty AR Shingles in Granite Black.
Brown Won't Let You Down!
New Haven, CT Roof Replacement


This homeowner worked with Inspector Drawin and Project Manager Austin to choose IKO Dynasty AR Shingles in Granite Black.
Brown Won't Let You Down!
Roof Replacement in New Haven, CT
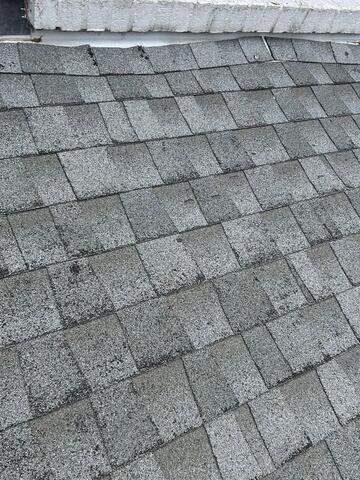
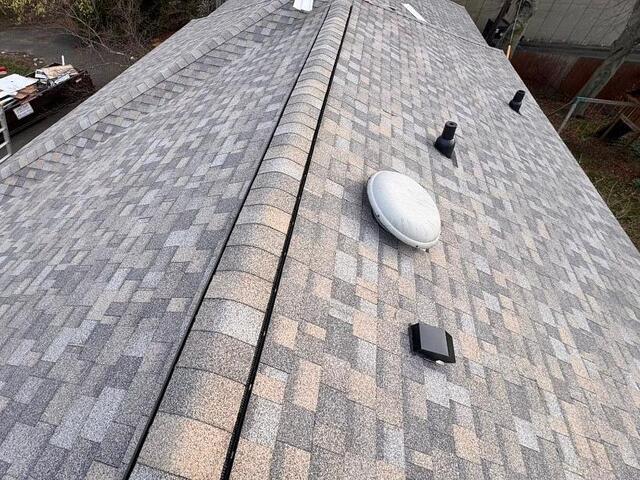
Our inspection of this roof showed damage such as missing granules, dark spots, and blistering. When blistering occurs, it is a slow process where shingles bubble and pop, as opposed to sudden storm damage. Now the roof is fortified and protected with IKO Dynasty Sentinel Slate shingles.
New Haven, CT Roof Installation


We installed all new life time roofing system on this New Haven, CT home.
Our Service Area
Proudly Serving Connecticut
We serve the following areas
- Ansonia
- Bantam
- Barkhamsted
- Beacon Falls
- Bethany
- Bethel
- Bethlehem
- Botsford
- Bridgeport
- Bridgewater
- Brookfield
- Canaan
- Cheshire
- Colebrook
- Cornwall
- Cornwall Bridge
- Cos Cob
- Danbury
- Darien
- Derby
- East Canaan
- East Haven
- Easton
- Fairfield
- Falls Village
- Gaylordsville
- Georgetown
- Goshen
- Greens Farms
- Greenwich
- Hamden
- Harwinton
- Hawleyville
- Kent
- Lakeside
- Lakeville
- Litchfield
- Middlebury
- Milford
- Monroe
- Morris
- Naugatuck
- New Canaan
- New Fairfield
- New Hartford
- New Haven
- New Milford
- New Preston Marble Dale
- Newtown
- Norfolk
- North Haven
- Northfield
- Norwalk
- Oakville
- Old Greenwich
- Orange
- Oxford
- Pequabuck
- Pine Meadow
- Plymouth
- Prospect
- Redding
- Redding Center
- Redding Ridge
- Ridgefield
- Riverside
- Riverton
- Roxbury
- Salisbury
- Sandy Hook
- Seymour
- Sharon
- Shelton
- Sherman
- South Britain
- South Kent
- Southbury
- Southport
- Stamford
- Stevenson
- Stratford
- Taconic
- Terryville
- Thomaston
- Torrington
- Trumbull
- Washington
- Washington Depot
- Waterbury
- Watertown
- West Cornwall
- West Haven
- Weston
- Westport
- Wilton
- Winchester Center
- Winsted
- Wolcott
- Woodbridge
- Woodbury
.png)

Brown Roofing Company, Inc., 12 Progress Ave., Seymour, CT 06483