

The Roof Before
Here's a look at Gary's mossy old roof. Now swipe through to see how we upgraded it to a sleek, brand-new roof!

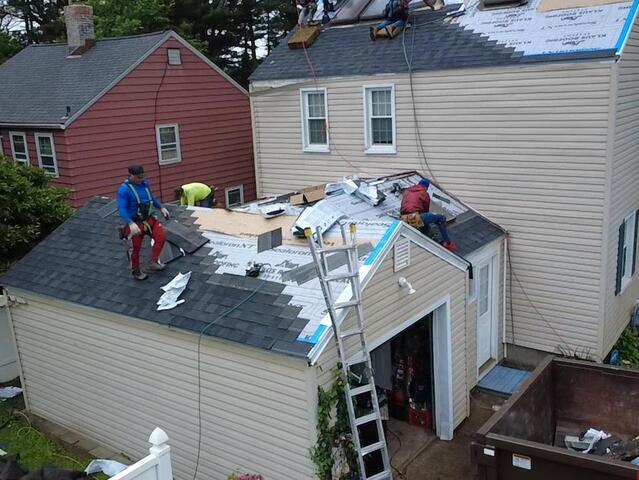
The Teardown Starts
The crew starts things off by carefully stripping all of the old shingles off of the roof. Before they begin, the crew hangs up large tarps to catch the falling debris as well as fully protect the homeowner's property from potential damage.

New Plywood Is Installed
Underneath the old shingles is a layer of wooden foundation called the decking. Gary's roof has a style of decking called plank. The crew removed all damaged sections of the plank decking and replaced them with strong new 1/2" CDX plywood, precisely cut to fit the removed spots.

Ice and Water Shield Is Installed
Ice and water shield are installed from eaves up six feet as well as around any more vulnerable sections like around Gary's skylights.

Drip Edge Flashing Is Installed
Synthetic underlayment is installed over the rest of the surface, and a drip edge flashing is installed around the edges of the roof to protect the fascia, diverting water towards the gutters.
New Shingles Are Installed
Now it's time to install the new shingles! Gary has selected the sleek shade of Granite Black from our IKO Dynasty collection to complement his home. These strong architectural shingles are proudly backed by Brown Roofing's 50-year warranty.

Ridge Vent Is Installed
Hot and humid air rising through the home is given an exit through a ridge vent, which improves ventilation and protects against moisture damage.

The Chimney Is Flashed
Flashing is installed around the chimney to ensure a strong seal to prevent water intrusion.

The New Roof
The crew added the final touches, cleaned the property thoroughly, and now Gary's roof is finished and looking its best!
