
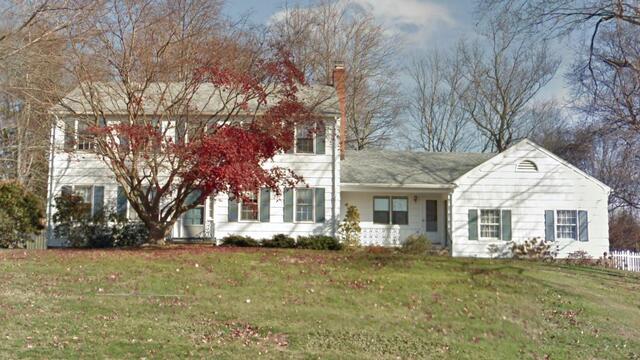
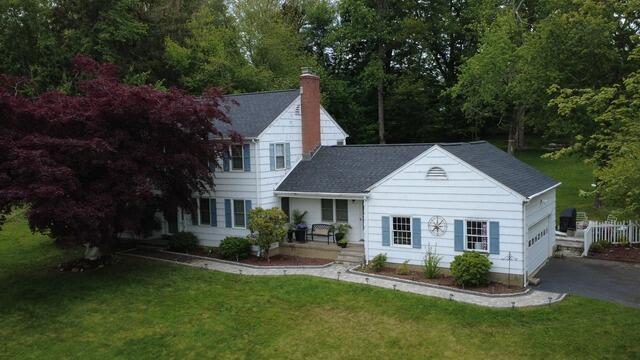
The Old Roof
Here's a look at Alvaro's roof from the front before the renovation. Click through to see the awesome transformation!
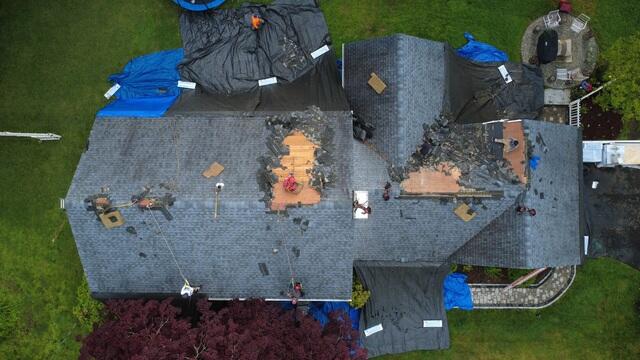
The Teardown Starts
The crew kicks things off by carefully stripping all of the old shingles off of the roof. Before the teardown begins, the crew hangs up large, heavy-duty tarps to catch the falling debris as well as completely protect the homeowner's property from potential damage.
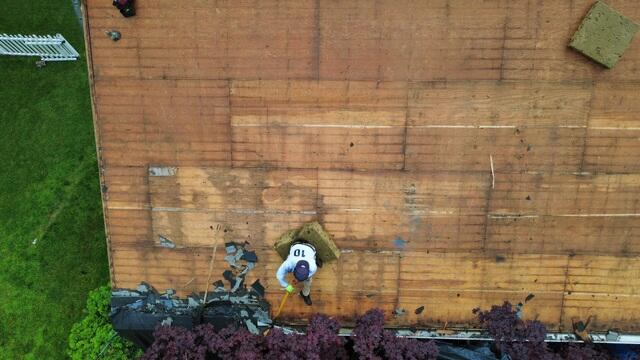
The Sheathing Is Exposed
Underneath the old shingles is a layer of plywood called the sheathing. This is the structural foundation of the roof, and, as such, must be in tip-top condition. The crew closely examines the entire surface for any signs of damage, like rot or mold.
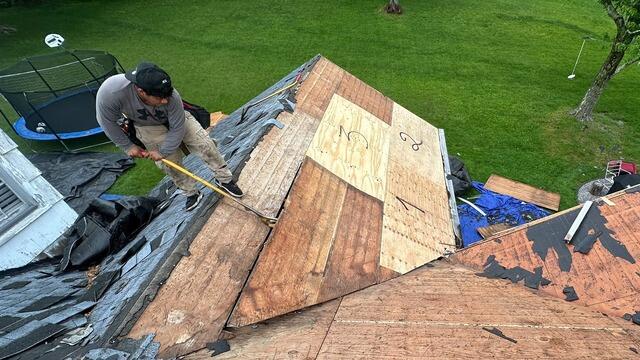
New Plywood Is Installed
Sections found with damage are removed and replace with sturdy new half-inch CDX plywood, precisely cut and firmly nailed down into place, securing a strong, solid base for the new roofing system. Each new sheet used is numbered for easy tracking so that the crew can accurately report back to the homeowner exactly how many sheets have been used.
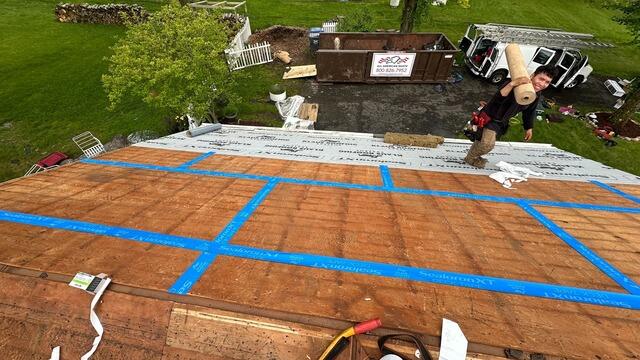
Seams Are Taped and Ice and Water Shield Is Installed
Per current building code, the crew tapes up all the seams of the plywood sheets with strong all-weather deck tape. Ice and water shield membrane is also installed from the eaves up six feet. This keeps the sheathing watertight and protected from harsh elements like rain, snow, and ice.
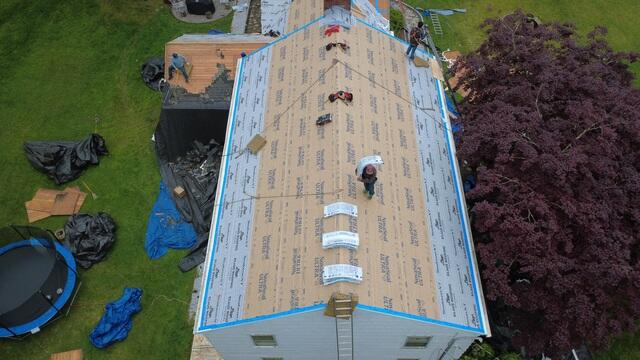
Underlayment Completed & Drip Edge Flashing Installed
The rest of the sheathing is covered by synthetic NovaSeal ULTRA underlayment, ensuring complete protection of the plywood. After that, drip edge and rake metal flashing are installed around the edges of the roof. This is a thin metal barrier that keeps water from seeping in through the sides, deflecting moisture away from the fascia and into the gutters.
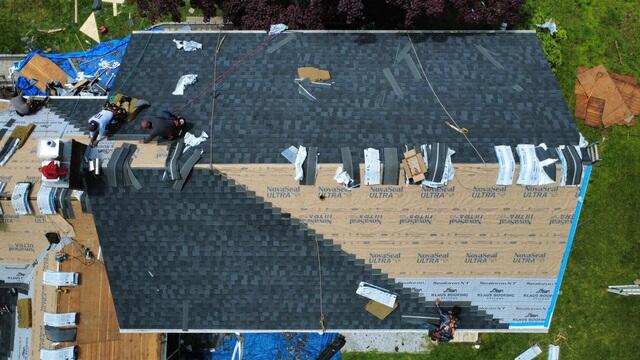
New Shingles Are Installed
Now it's time to install the new shingles! For his new roof, Alvaro has selected the sleek and ever-popular shade of Granite Black from our premium-laminated IKO Dynasty collection to perfectly complement his home. These Impact 3 architectural shingles are proudly backed by Brown Roofing's 50-year warranty.
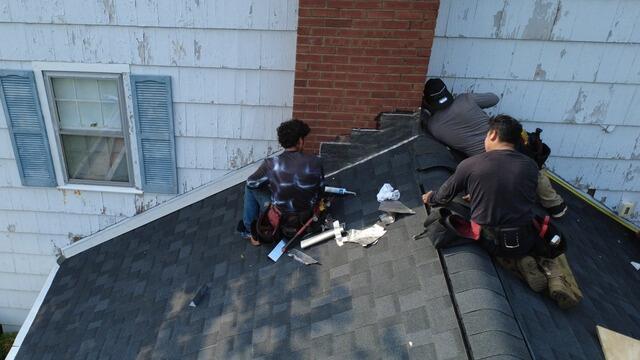
New Flashing Is Installed on the Chimney
Flashing is installed on the sides of the chimney where it meets the roof in the form of thin lead, securely caulked to create a watertight seal, preventing moisture from seeping into an otherwise vulnerable junction.
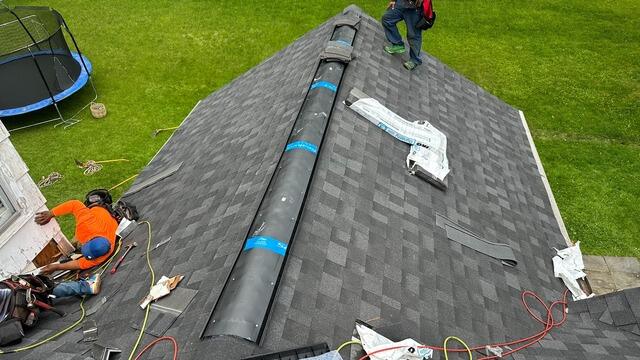
Ridge Vent Is Installed
A vent is installed along the ridges of the roof to ensure proper airflow. These vents allow hot, humid air that rises from inside of the house a way to escape, eliminating damaging moisture buildup.
The Finishing Touches
Ridge cap shingles are installed over the ridge vents to ensure a polished and seamless finish, and the roof pipes are secured with durable Lifetime Ultimate Pipe Flashing,
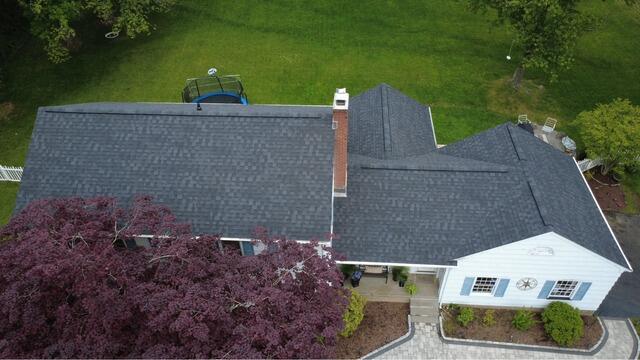
The New Roof
After a spotless cleanup of the yard and a thorough inspection of everything, Alvaro's roof is officially complete and ready to stand strong for years to come!
