

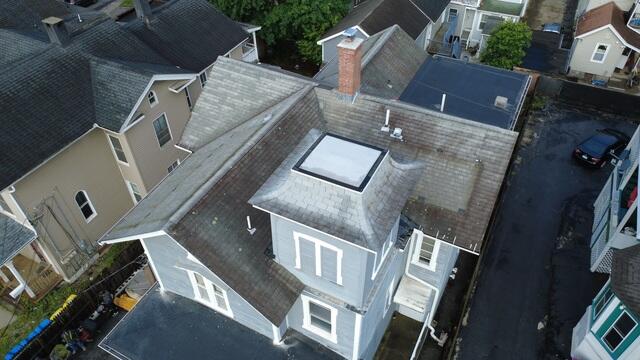
Before: Front View
Here's a look at Leonard's house from the front before the roof renovation. This old roof is ready for a total makeover! Click through to see how we did it!
Before: Solar Panels Removed
Because Leonard has solar panels, they were carefully removed before the roof teardown could begin. As you can see here, moss and moisture often build up around panels, trapping damage beneath them. Time to clean it up and install durable new shingles that can better withstand moisture and improve water runoff.
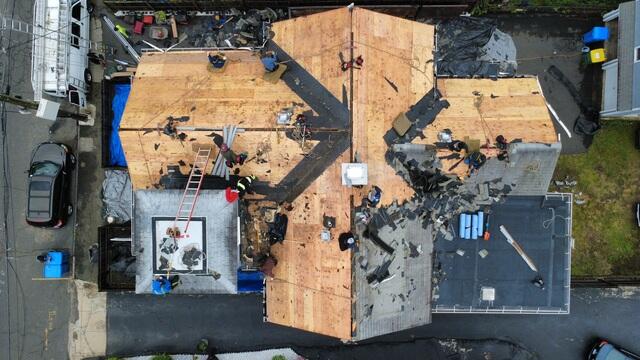
The Old Shingles Come Off
The crew begins carefully stripping off of the old shingles off of the plywood layer which is called the sheathing. The sheathing is the structural foundation of the roof, and as such, must be in tip-top health. Any sections found with damage, like rot or mold, are removed and replaced with strong new CDX plywood.
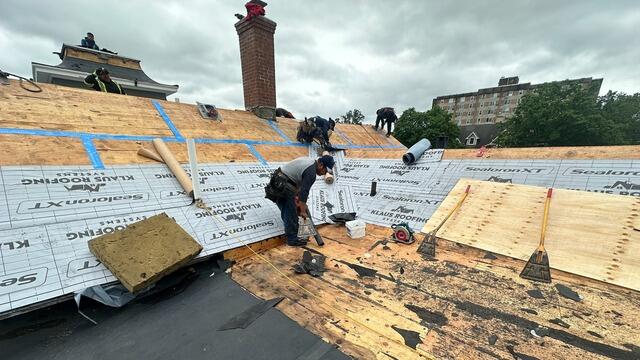
Seams Are Taped and Ice and Water Shield Is Installed
With the sheathing inspected and new plywood installed where needed, ice and water shield is installed from the eaves up six feet as well as along all of the valleys. This thin, waterproof membrane adheres directly onto the sheathing to protect it from harsh elements that could cause moisture damage like rain, snow, and ice.

Underlayment Is Installed
The rest of the sheathing is lined with NovaSeal ULTRA synthetic underlayment for the best protection possible. After that, we will be ready for new shingles!
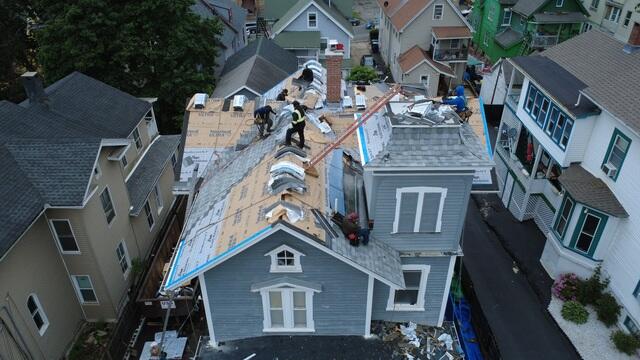
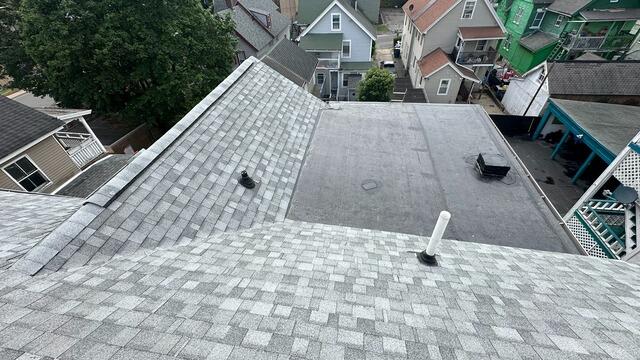
New Shingles Are Installed
For his new roof, Leonard chose the sleek shade of Frostone Gray from our premium-laminated IKO Dynasty shingles. These heavyweight shingles are proudly backed by Brown Roofing's 50-year warranty.
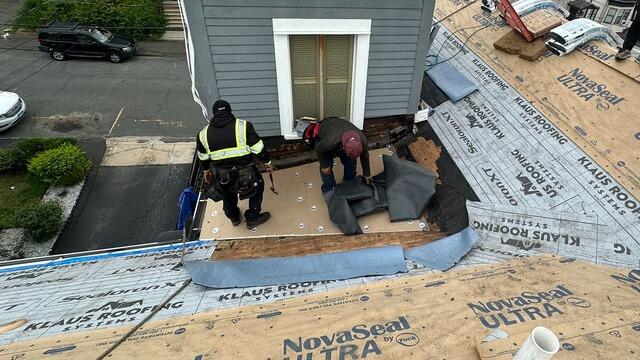
EPDM Insulation Is Installed
A few sections of Leonard's roof are flat, so instead of shingles, a specialized EDPM (ethylene propylene diene monomer) roofing system is installed in these areas. The first layer, the insulation, is cut to fit and then firmly secured into place.
EDPM Membrane Is Installed
The top layer of the EDPM roof, called the membrane, is firmly adhered on top of the insulation to create a watertight seal and seamless finish.
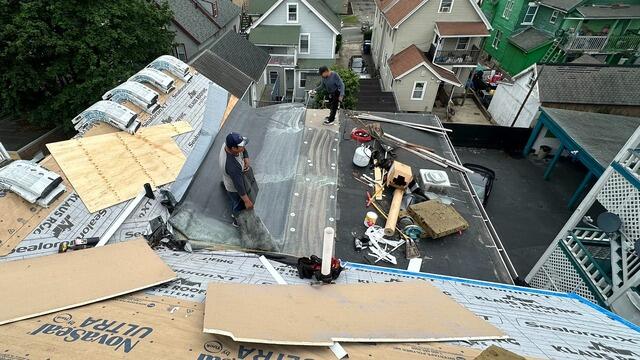
The Finished EDPM Roof
After being carefully rolled out with a roof roller to eliminate air bubbles and ensure a tight, secure seal, the EPDM sections are now complete!
Ridge Vent Is Installed
A vent is installed along the ridges of the roof to ensure that air properly flows through the attic, allowing hot, humid air rising from inside of the house a way to escape, cutting down on damaging moisture buildup.
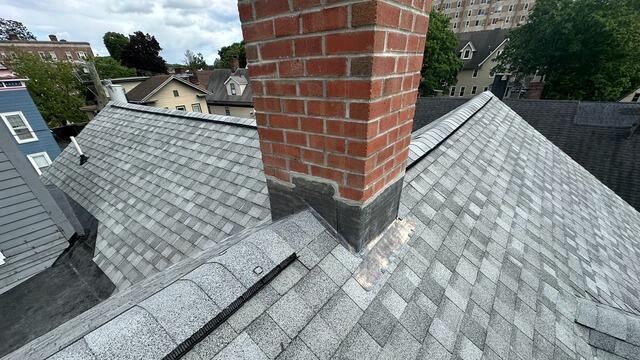
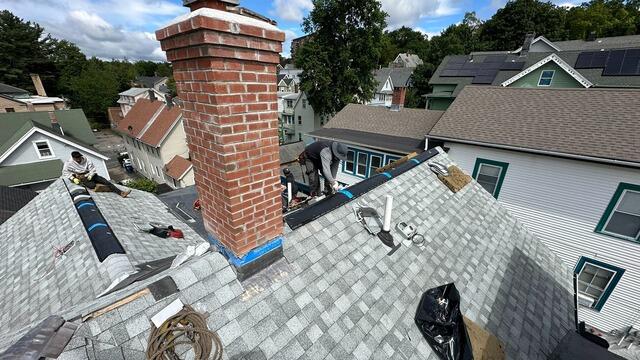
New Flashing Is Installed on the Chimney
A thin metal barrier called flashing is installed around the chimney where it meets the roof, ensuring moisture is prevented from seeping through this critical junction.

New Pipe Boots Are Installed
Three Lifetime Ultimate Pipe Flashing boots are installed around each roof pipe. Like the flashing around the chimney, this helps ensure a watertight seal.
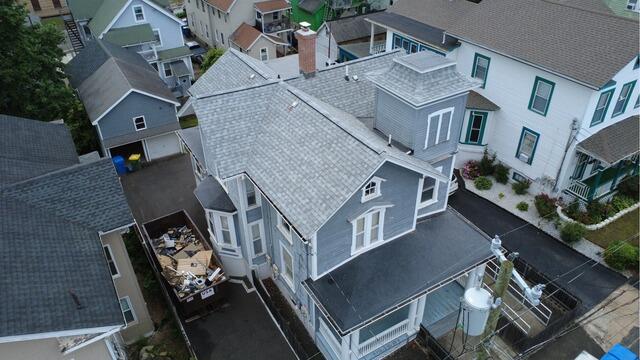
After: The Finished Look
After some finishing touches and a spotless cleanup of Leonard's yard, his new roof is officially complete and looking stunning!
