

The Roof Before
Here's a look at Floriana's roof before the renovation. Swipe through to see the stunning transformation!
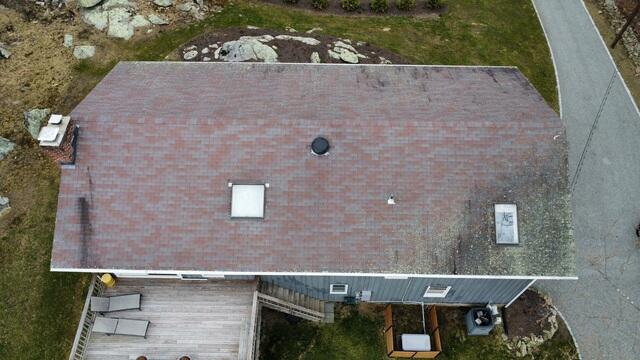
Before: Aerial View
In this bird's-eye view photo of the old roof, you can see how much algae and lichen have built up on the weathered shingles all over and especially in the bottom right corner. Let's get rid of those invasive, moisture-loving plants once and for all!

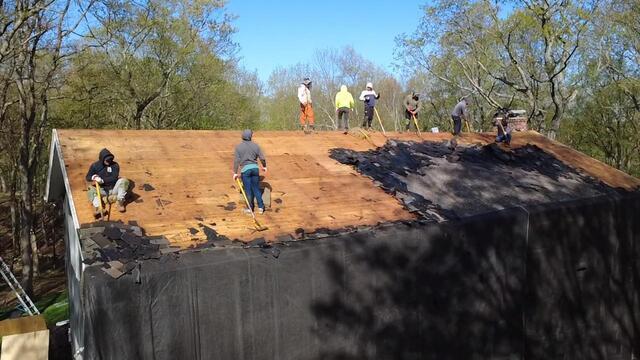
The Teardown Begins
The crew kicks things off by tearing off all of the old shingles. Before they begin, they hang up large tarps to catch the falling debris as well as ensure that the homeowner's property is fully protected from any potential damage.
The Sheathing Is Exposed
Underneath the shingles is a layer of plywood called the sheathing. This is the structural foundation of the roof. After all of the old shingles are fully removed, the crew will closely inspect the sheathing for any evidence of damage, such as rot or mold.
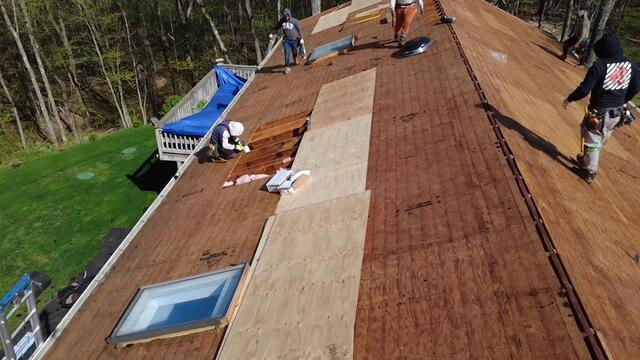
New Plywood Is Installed
Any sections found with damage are removed and replaced with strong new CDX plywood, precisely fit to ensure a strong and solid base.

Seams Are Taped & Underlayment Is Installed
All-weather deck tape is used to tape up the seams of each sheet of plywood. After that, underlayment is installed over the entire surface. This is a thin, waterproof membrane that protects the sheathing from harmful elements like rain, wind, snow, and ice.
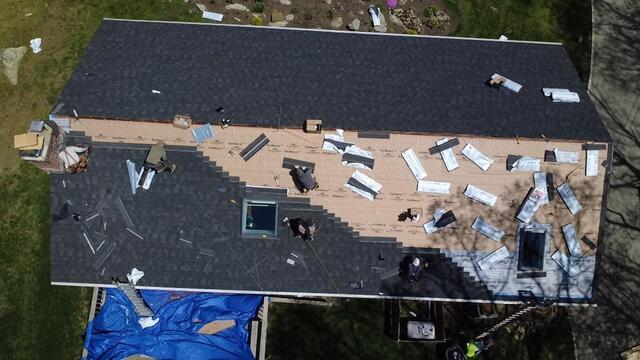
New Shingles Are Installed
Now it's time to install the new shingles! Floriana has selected the incredibly popular and timeless shade of Granite Black for her new roof. These premium-laminated IKO Dynasty shingles are proudly backed by Brown Roofing's 50-year guarantee!
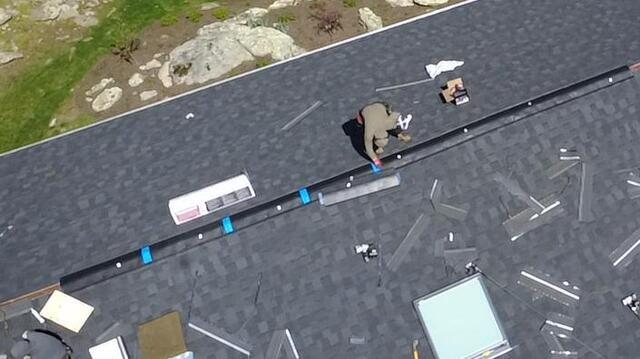
Ridge Vent Is Installed
A vent is installed along the ridge of the roof. This vent ensures proper airflow by allowing hot, humid air rising from the house a way to escape-eliminating damaging condensation buildup.

New Skylights Are Installed
Brand-new VELUX brand skylights are installed, replacing Floriana's old ones with a chic and modern new look.
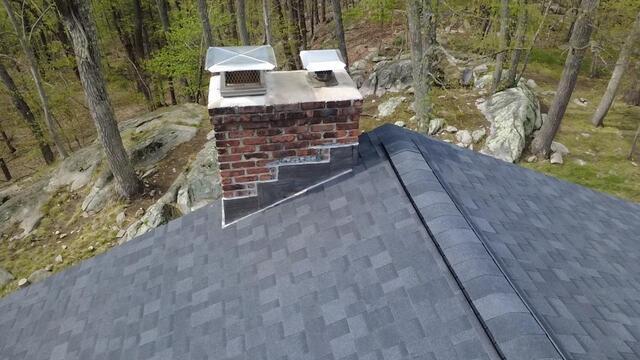
New Flashing Is Installed on the Chimney
New flashing is installed on the side of the chimney where it meets the roof. This is a thin metal barrier that diverts water away from the junction, preventing moisture from seeping under the shingles.
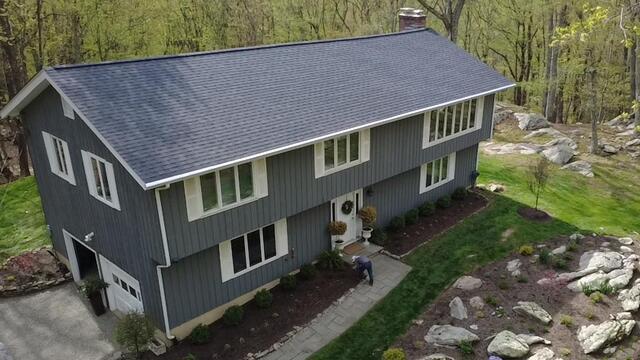
The Roof After
After a few finishing touches and a meticulous cleanup of the entire property to ensure it is left spotless, Floriana's new roof is officially complete!
