
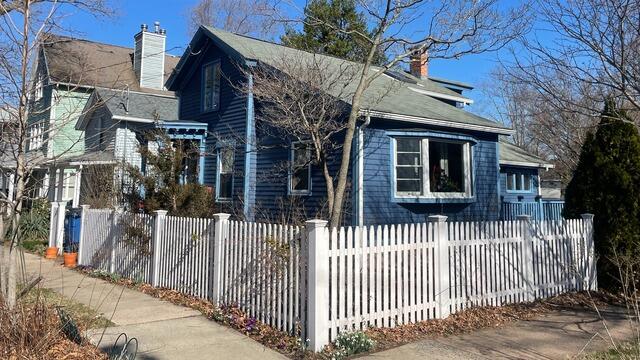
Before: Southeast View
Here's a look at Meredith's roof before the renovation. Click through to see the stunning transformation!
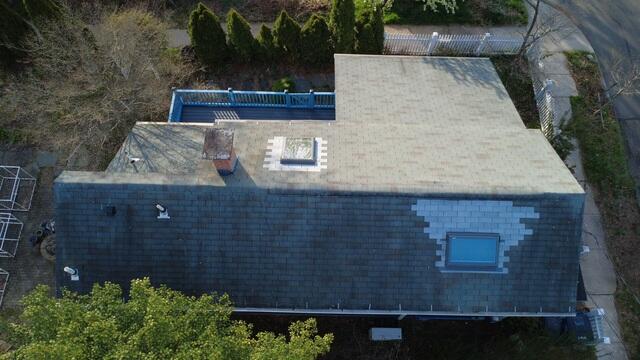
Before: Aerial View
This bird's-eye view of the old roof says it all-those outdated three-tab shingles and the mismatched patch job around the skylight have definitely seen better days. It's time for an upgrade, and we're ready to get started on a fresh new roof!
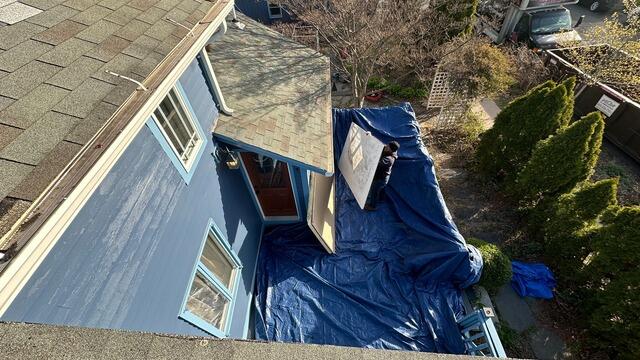
Prepping the Property
Before the teardown begins, the crew lays out tarps around the property to catch falling debris and make for a more efficient cleanup process as well as ensure that the homeowner's land is completely protected from potential damage.
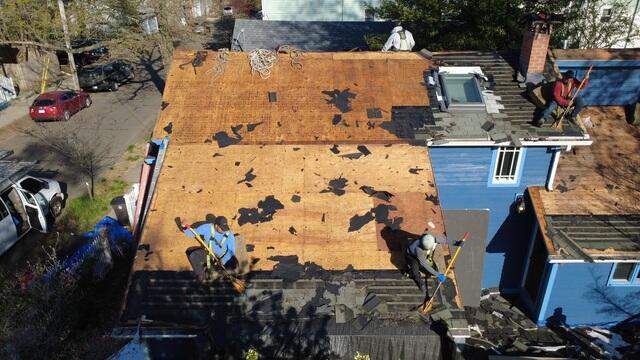
The Teardown Begins
With all of the tarps set up, the crew starts carefully stripping the old shingles off of the roof. This reveals the layer of plywood underneath, which is called the sheathing. The sheathing is the structural foundation of the roof.
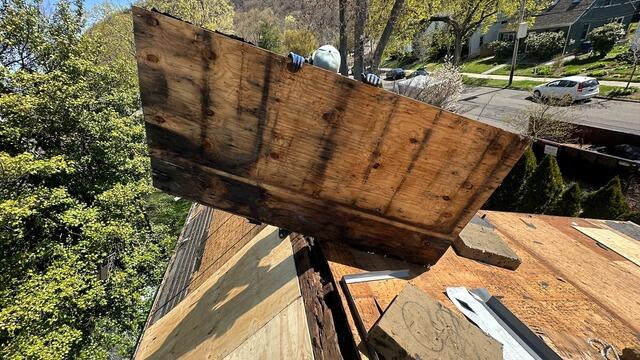
Bad Plywood Is Removed
As the structural foundation of the roof, the health of the sheathing is essential. Any sections found with damage, rot, decay, or mold-like this sheet here-are removed.

New Plywood Is Installed
Sturdy and brand-new 1/2" CDX plywood replaces the removed sections, ensuring a solid base for the new roof. Each sheet used is numbered for easy tracking by the crew so that they can accurately report back to the homeowner exactly how many new sheets were installed.
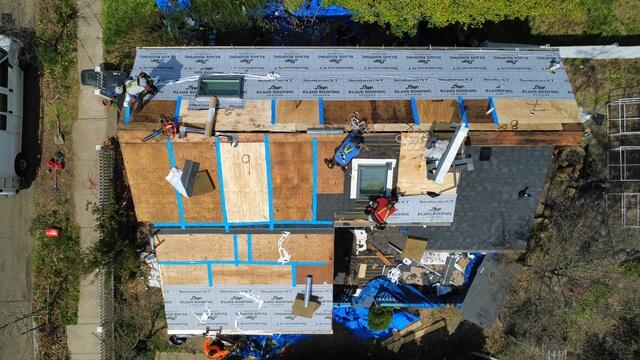
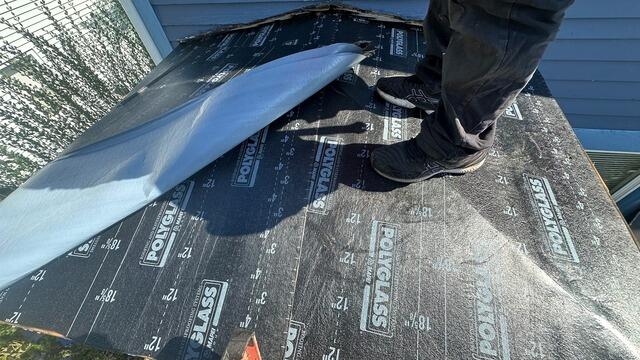
Seams Are Taped & Underlayment Is Installed
The seams of each sheet of plywood are taped up with all-weather deck tape for added reinforcement. After that, a layer of underlayment is installed over the entire surface. This thin, water-resistant membrane shields the sheathing from harsh elements that could cause moisture damage, such as rain, snow, and ice.
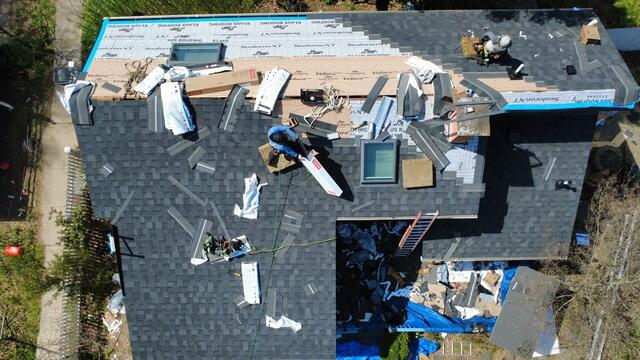
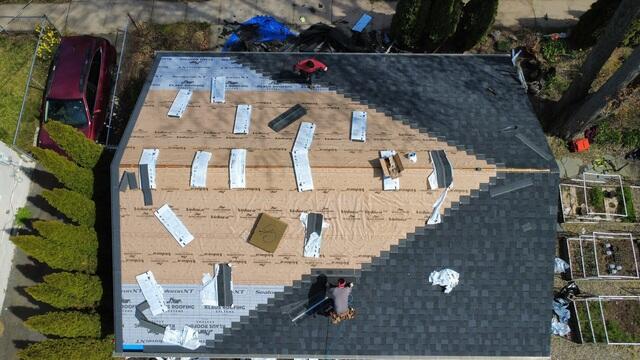
New Shingles Are Installed
Now it's time to install the new shingles! For her new roof, Meredith has chosen the gorgeous and ever-popular shade of Granite Black from our premium-laminated IKO Dynasty collection! These heavyweight, architectural shingles are proudly backed by Brown Roofing's 50-year warranty.
Same for the Garage
Meanwhile, the same exact process is happening for Meredith's garage. Those shingles are definitely stunning!
New SBS Roof Installed Above Porch
This small porch roof needed its roof replaced as well. The slope of this section is so low that, in accordance with current building codes, a specialized SBS (styrene-butadiene-styrene) roofing system needs to be installed here as opposed to shingles. This first layer, the base, acts as the underlayment.
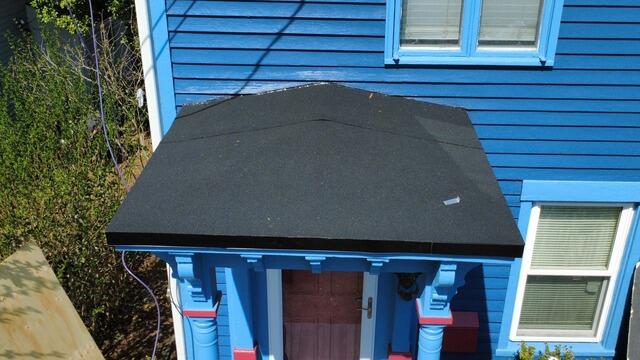
New SBS Roof Is Complete
The second layer is called the cap, and it has a very fitting name. After the cap is securely adhered, this SBS section is complete!

Ridge Vent Is Installed
A shingle vent is installed along the roof ridge, promoting proper airflow by allowing hot, moist air to escape. This helps prevent condensation buildup that could lead to damage over time.
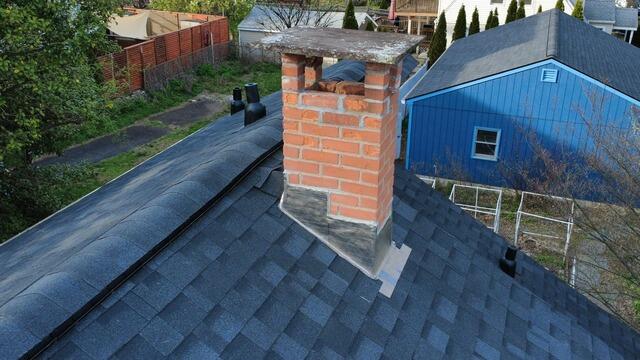
New Flashing Is Installed on the Chimney
Thin metal flashing is installed around the chimney where it meets the roof. This acts as a protective barrier, ensuring water can't seep into the junction and cause damage.
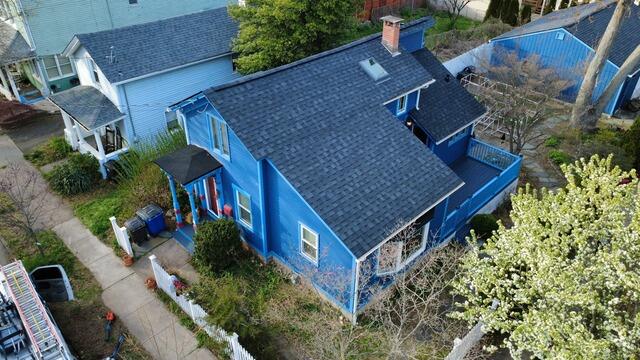
After: Southeast View
With a few final touches, Meredith's new roof is officially complete and ready to stand strong for years to come!
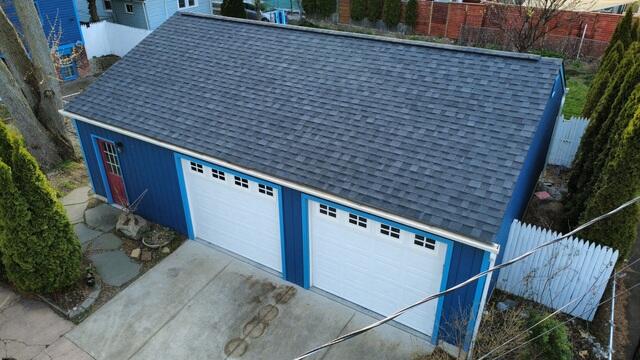
After: Garage
Meredith's garage roof is also fully renovated and ready to take on whatever Mother Nature throws its way!
