
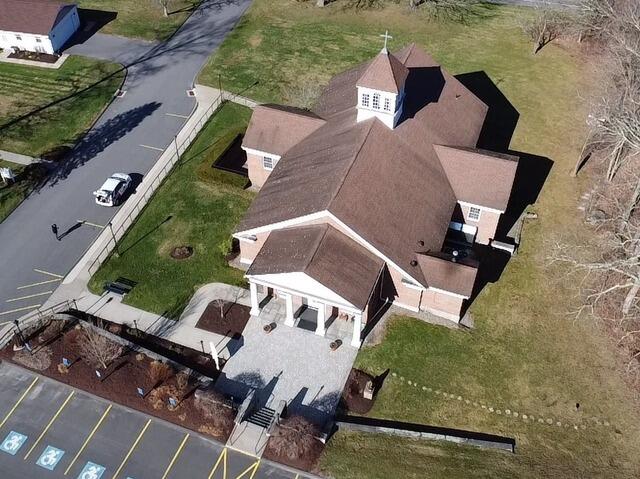
Before: Aerial View
Here's a bird's-eye view of the St. Thomas the Apostle Catholic Church. Swipe through to see the excellent transformation!
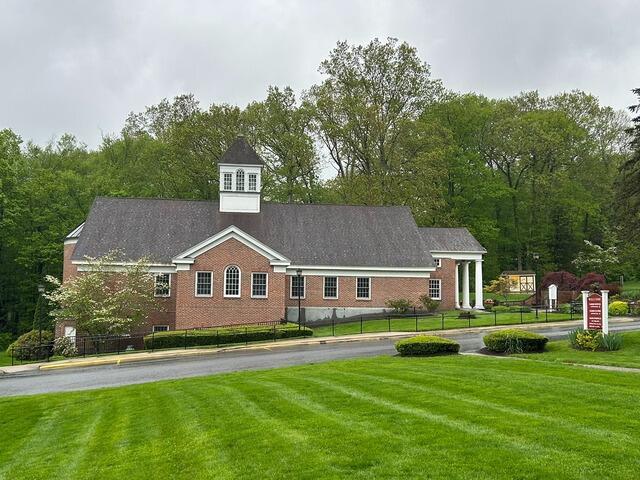
Before: Northwest View
A lot of the moss, lichen, and algae buildup is concentrated on the northwest side of the church's roof, where moisture tends to linger the longest. Over time, this has led to significant shingle deterioration. It's definitely time to fix it up!

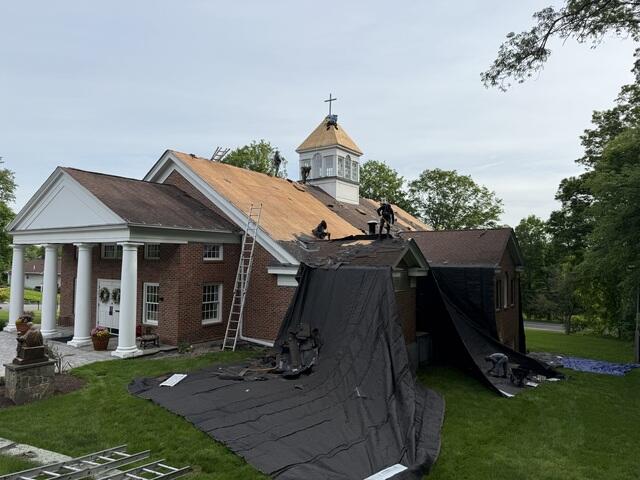
The Teardown Begins
The crew starts by hanging large tarps around the edges of the roof and laying them across the yard. These tarps catch falling debris and help protect the homeowner's property from any potential damage during the project.
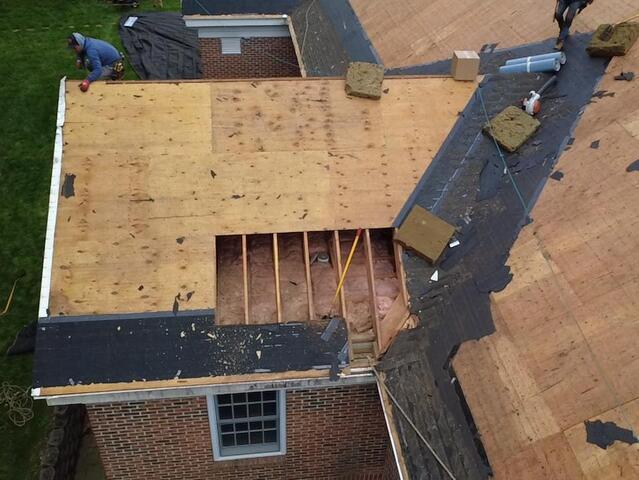
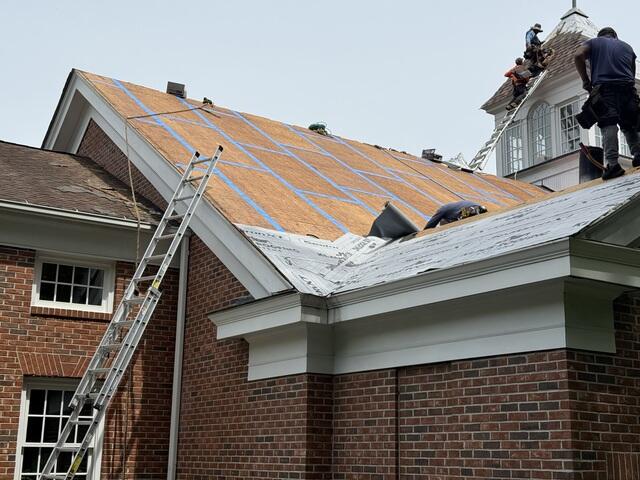
The Sheathing Is Exposed
The crew carefully strips all of the old shingles off of the roof, revealing the plywood layer underneath. This plywood layer is called the sheathing, and it is the structural foundation of the roof. The crew will closely inspect the sheathing for any evidence of damage, like rot or mold.
Bad Plywood Is Removed
Any plywood found with damage is removed and replaced, ensuring a strong, solid base for the new roofing system.
Seams Are Taped and Ice and Water Shield Is Installed
As per current building code, the seams of each sheet of plywood are taped up with all-weather Sealoron XT deck tape. Ice and water shield membrane is installed from the eaves up six feet as well as along all of the valleys to ensure waterproofness to harsh elements like rain, snow, and ice.
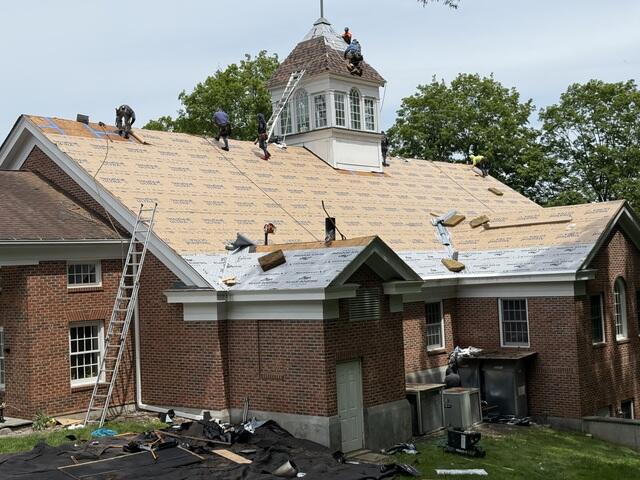
Underlayment Is Installed
The rest of the roof is covered by NovaSeal ULTRA synthetic underlayment, creating a full layer of protection over the sheathing and adding an extra measure of reinforcement.
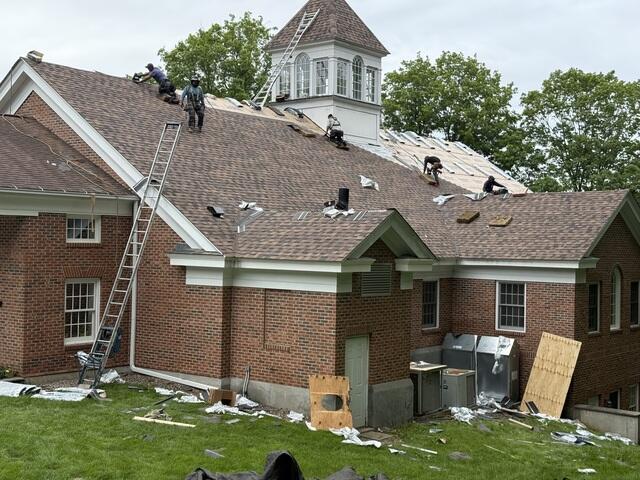
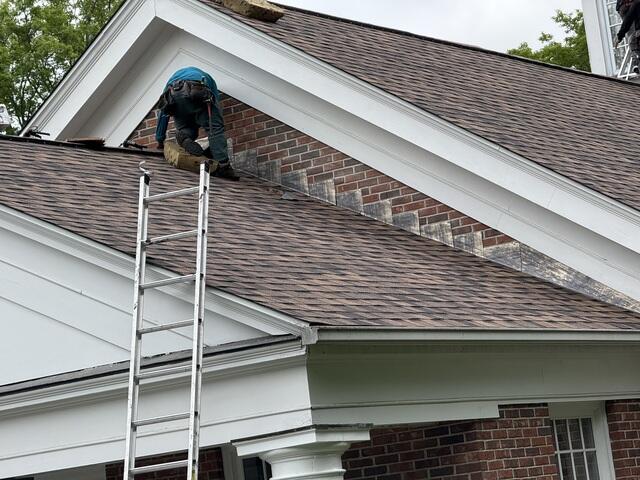
New Shingles Are Installed
Now it's time for the new shingles to go on! The crew installs IKO Dynasty premium-laminated, architectural shingles in the gorgeous shade of Brownstone to fantastically complement the church's beautiful brick walls. These heavy-duty Impact 3 shingles are proudly backed by Brown Roofing's 50-year warranty.
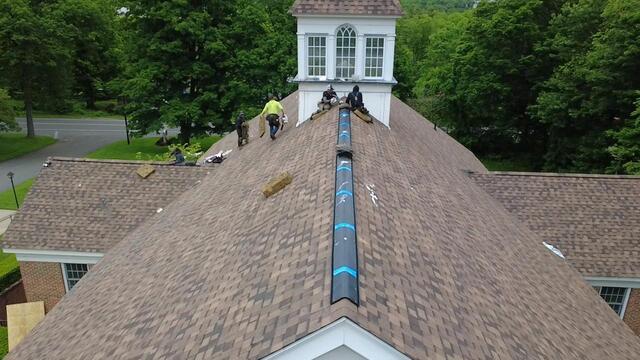
Ridge Vent Is Installed
A vent is installed along all of the ridges of the roof. These allow for proper airflow by letting hot, humid air that rises from inside of the building a way to escape, eliminating damaging condensation buildup.
Step-Flashing Is Installed
Step-flashing is installed along the side of the wall where it meets the roof. This is a thin metal barrier that directs water away from the junction to create a watertight seal and fight moisture damage.
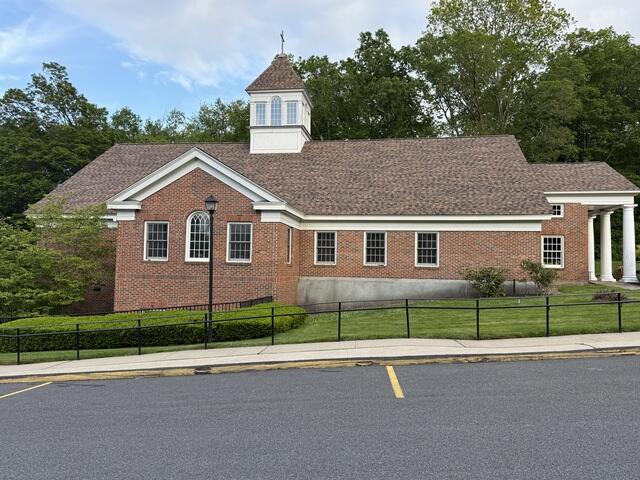
After: Northwest View
After a few finishing touches and a thorough cleanup of the entire yard, St. Thomas Church's new roof is complete!
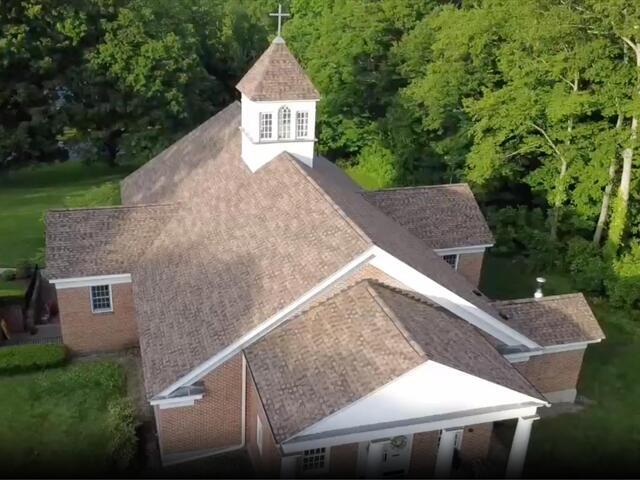
After: Aerial View
Sleek and strong, this new roof is guaranteed to keep parishioners safe and dry for decades to come.
