
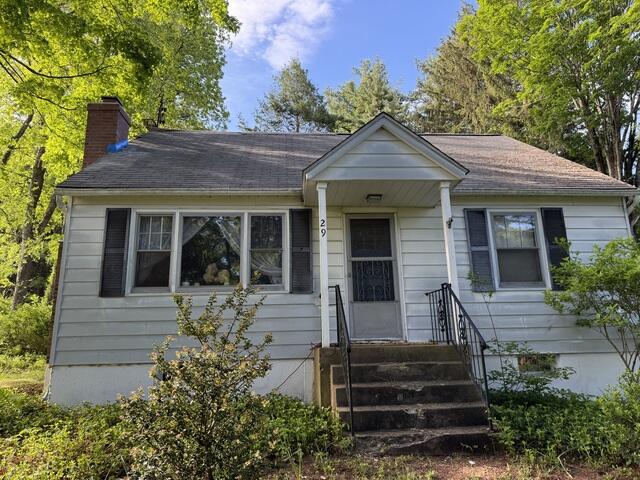
The Roof Before
Here is a look at Cindy's roof from the front right before the renovation. Swipe through to see the amazing transformation!
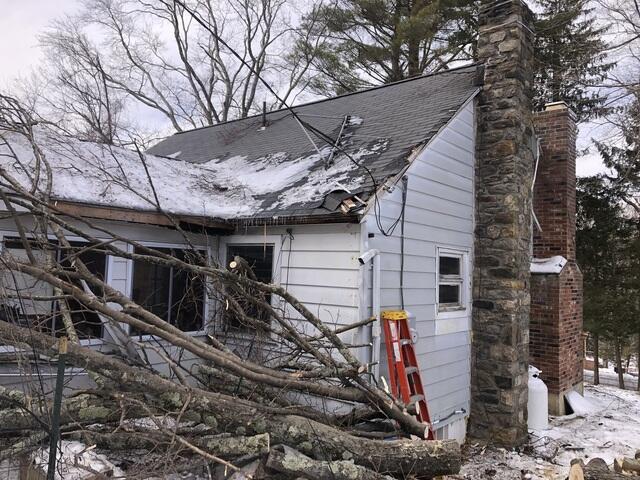
Fallen Tree Damage
Here's a look at Cindy's roof right after the storm brought a tree down on it. A tough break-but now it's time for a stronger, better roof that will give her peace of mind for years to come!
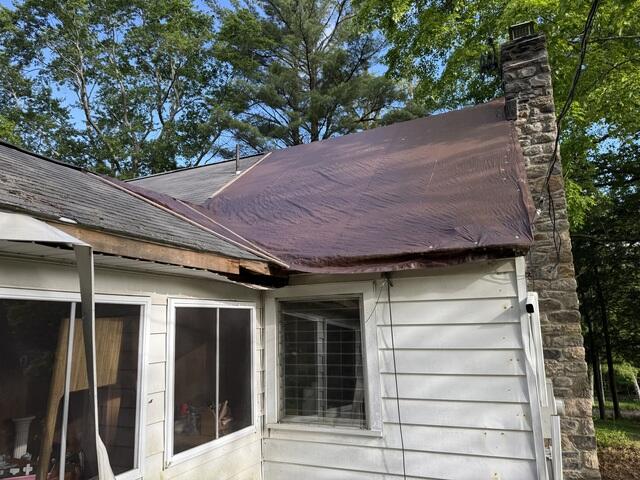
Tarped for Now
The crew provided a temporary yet efficient fix for Cindy's broken roof by installing a tarp over the damage until the insurance money arrived for her new roof.
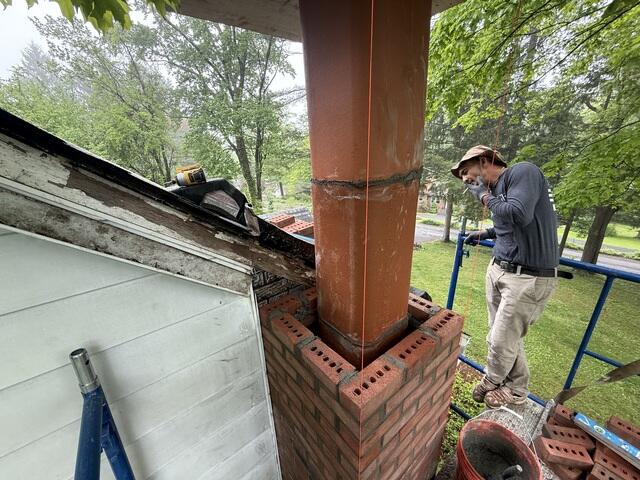
A New Chimney
The project kicks off with our expert masons on site, carefully rebuilding the section of the chimney that was damaged by the fallen tree. Their precise work lays the foundation for a safe, secure, and long-lasting repair.
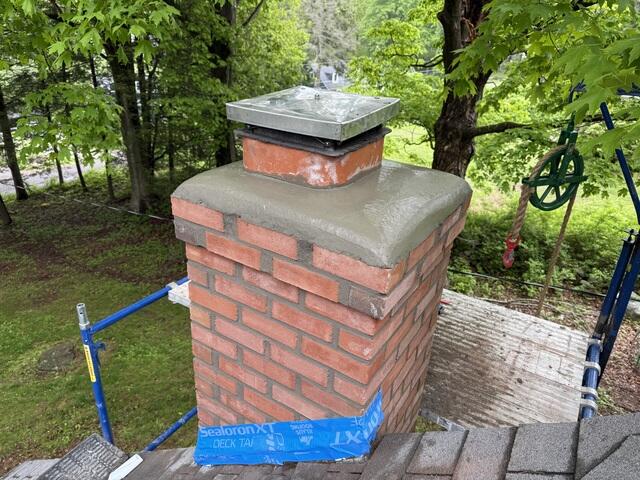
The Finished Chimney
The chimney is finished off with a brand-new strong crown: a concrete slab that covers the top opening and protects the structure from water damage, and metal cap: a device installed at the top of the flue to prevent water, debris, and wildlife from entering.

The Teardown Begins
With the chimney repaired, it's time to start on the roof. The crew carefully strips all of the old shingles off of the roof. Before they begin, they lay down and hang up large tarps to catch the falling debris as well as ensure protection of the homeowner's property from potential damage.
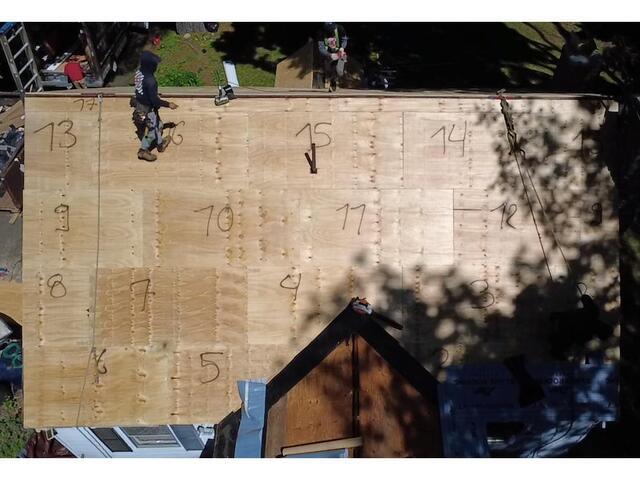
New Plywood Is Installed
Underneath the old shingles is a layer of plywood called the sheathing. This is the structural foundation of the roof, and as such, the health of the sheathing is essential. The crew found that Cindy's current sheathing needed to be fully replaced in order to ensure a solid and strong base for the new shingles. All of the old plywood is removed and sturdy 1/2" CDX plywood is securely fitted and nailed down into place.
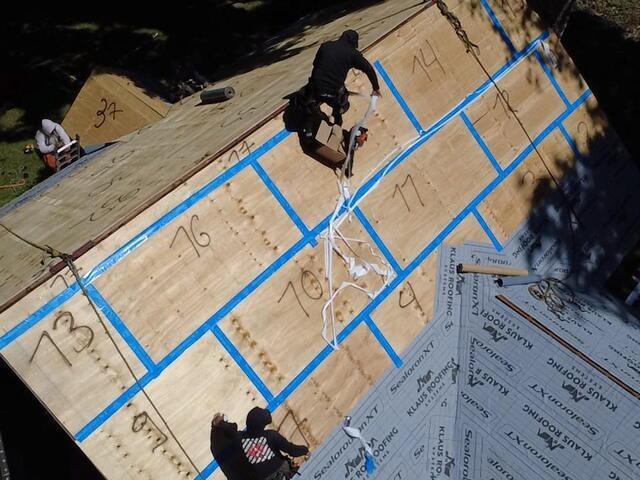
Seams Are Taped and Underlayment Is Installed
The seams of each plywood sheet that makes up the sheathing is taped at the seams with all-weather Sealoron XT deck tape in order to meet current building codes. After that, a layer of underlayment is applied over the entire surface. This is a thin, water-resistant material that shields the sheathing from harsh elements like rain, wind, snow, and ice. The first part of the underlayment, called the ice-and-water shield, is adhered firmly to the sheathing from the eaves to six feet up. It is also adhered to all valleys of the roof.
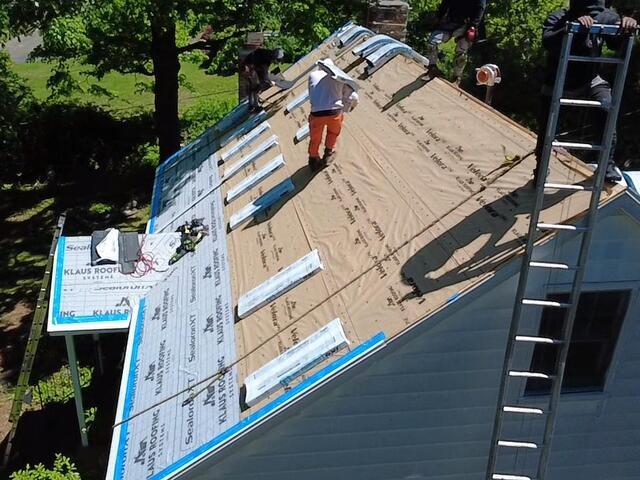
The Rest of the Underlayment and Flashing Are Installed
After the ice-and-water shield, Velora One synthetic underlayment is installed over all of the rest of the surface. Next, drip edge and rake metal flashing is securely nailed around all edges of the roof. This is a thin metal barrier that prevents moisture from seeping underneath, diverting the water to the gutters. The flashing is them taped up with the Sealoron XT deck tape as well.
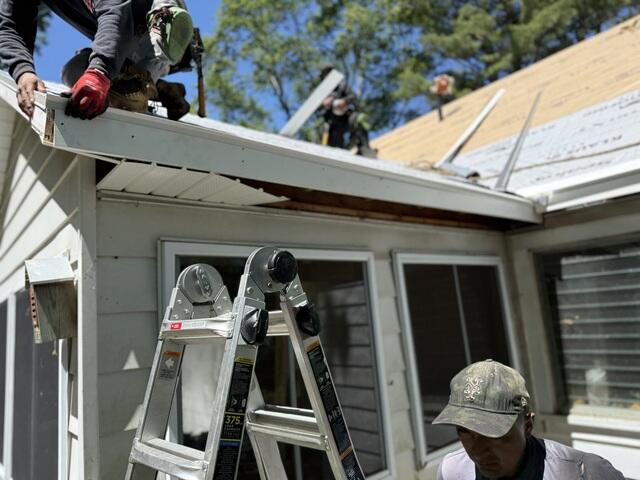
New Fascia and Soffit Vents
The crew installs brand new fascia board. The fascia is the long, horizontal board that runs along the front edge of the roof's overhang. In addition, the crew installs new soffit vents. This is the area directly underneath the fascia. The soffit vents allow the roof to "breathe" properly and help reduce condensation buildup.
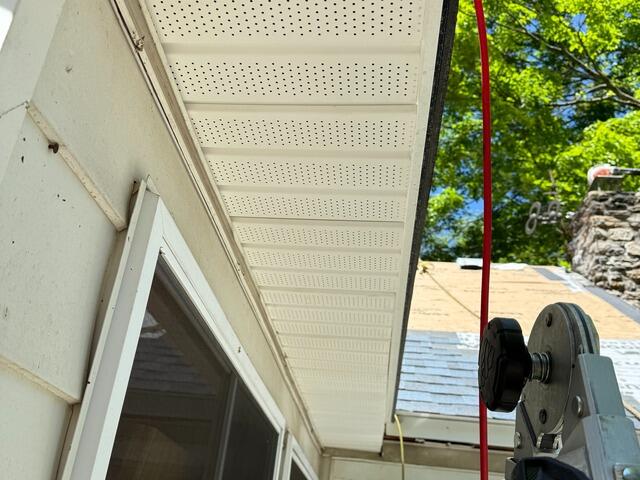
The Finished Soffit
With the brand new soffit fully in place, the roof is now safe from inner moisture buildup.
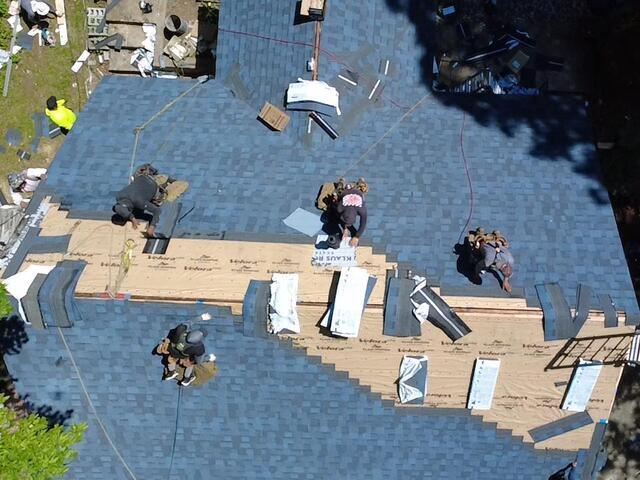
New Shingles Are Installed
Now it's time to start installing the new shingles! For her new roof, Cindy has selected the sleek shade of Atlantic Blue from our IKO Dynasty collection. These beautiful, premium-laminated, and architectural shingles are proudly backed by Brown Roofing's 50-year warranty.
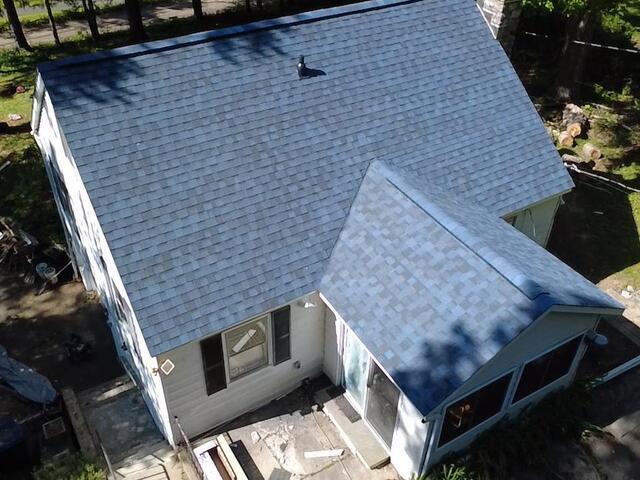
The Roof After
With the final touches in place-a ridge vent for proper airflow, a ridge cap for a clean, seamless finish, sturdy new flashing for the boot, and a spotless cleanup of the entire property-Cindy's brand-new roof is complete and ready to stand strong against whatever Mother Nature sends its way for years to come!
