

The Roof Before
Here's a look at Vincent's roof before the renovation. Click through to see the fantastic way we transformed it!
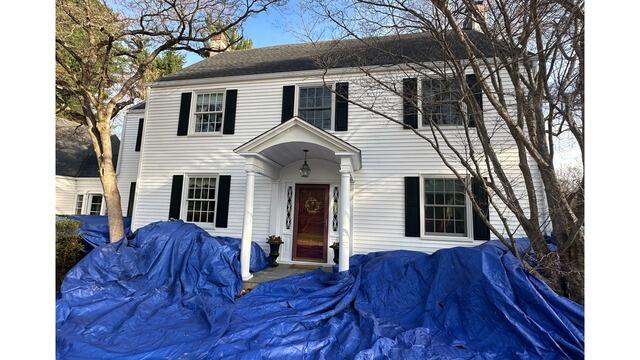
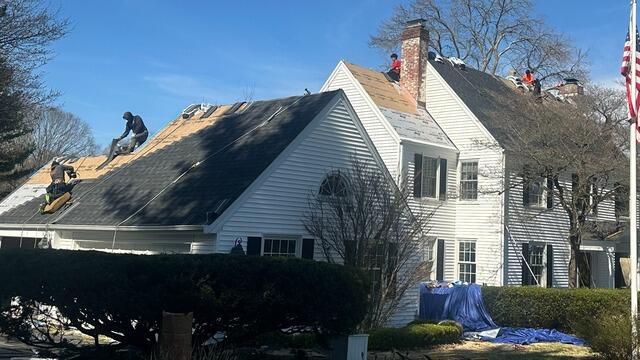
Preparing for the Teardown
Before the crew gets to work taking off the old roof, large tarps are laid out across the yard to ensure that the property is fully protected from falling debris. In addition, this helps aid the cleanup process.

The Old Shingles Come Off
The crew carefully strips all of the old shingles off of the roof, revealing the layer of plywood underneath. This is called the sheathing, and it is the structural foundation of the roof. Before the new shingles can go on, the crew must closely inspect the sheathing for any signs of damage, such as rot or mold, and remove any affected areas.
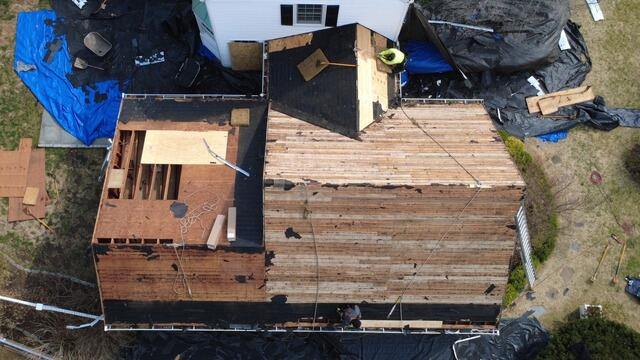
New Plywood Is Installed
Strong new 1/2" CDX plywood is installed, cut and sized to precisely fit where the damaged sections have been removed, ensuring a secure and solid base for the new roof.
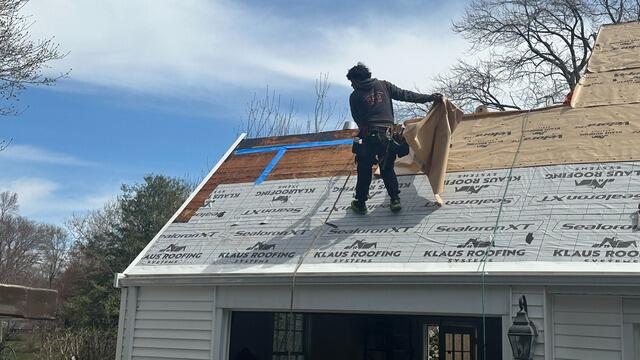
Seams Are Taped & Underlayment Is Installed
With all of the new sheathing in place, it's time to tape up the seams of each plywood sheet with all-weather deck tape as required by building code. After that, the underlayment is installed. This is a thin, water-resistant material that shields the sheathing from harmful elements like rain, wind, snow, and ice.
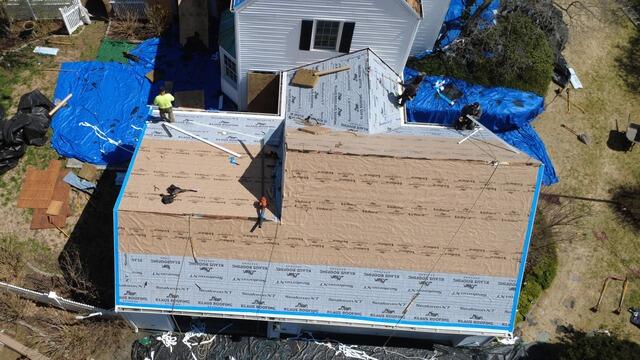
Ready for New Shingles
A drip edge flashing is installed around all of the edges of the roof. This is a thin metal barrier that prevents the water from seeping into the roof from the edges by guiding it away from the fascia and into the gutters. This is also securely taped up with all-weather deck tape.
New Shingles Go On
Let's install those new shingles! Brown Roofing proudly installs premium-laminated IKO Dynasty shingles for all roofs backed by our 50-year warranty. Vincent has selected the ultra-popular shade of Granite Black to perfectly complement his home.

Copper Flashing Is Installed on the Chimney
Flashing is installed along the sides of the chimney where it meets the roof. Much like the drip edge, this thin metal prevents water from seeping in through a vulnerable junction. Vincent opted to have gorgeous copper flashing installed, adding a touch of modern elegance.
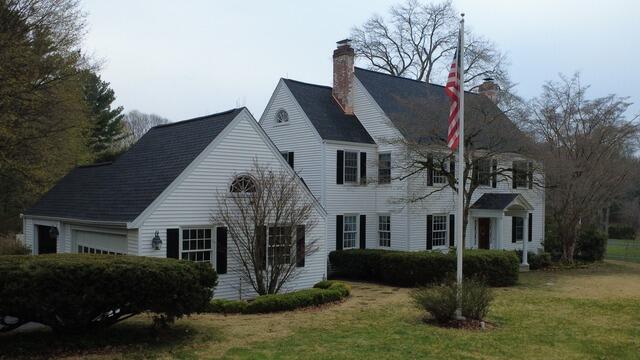
The Roof After
With a few finishing touches, such as installing a ridge vent and ridge cap as well ass securing all of the flashing around any roof pipes, Vincent's roof is officially complete-built to last and looking beautiful!
